Wednesday, April 27, 2016
Life's a Picnic....
Warm weather is right around the corner which is the perfect time for what else? A Picnic! And talking about picnics, DigiBox Designs has this great picnic ant digital file called "Pop of Color Digi Life's a Picnic" and right now you can get it for only $.75!! This file comes with the watermelon already colored in. Just download, print out, and color. I colored this one using my Spectrum Noir alcohol markers and then enhanced the colors even more by using my Prismacolor Colored Pencils to deepen and enhance the shading. Using a 5x7 white blank card, I then used two shades of red card stock as mats and red and white gingham scrapbook paper which I die cut to give it a decorative edge. I chose the gingham to give the impression of a picnic blanket. Red grosgrain ribbon and small red and white flowers add the final touches to this cute, colorful card.
The inside has a white piece of card stock on top of a larger piece of the red gingham. The word "Enjoy" and the sentiment on the front of the card have been added using my word processor. I stamped a small black ant in the lower corner to carry the theme to the inside of the card.
I am really realizing my love for coloring. These adorable images from DigiBox designs are wonderful and so much fun to color. You should stop by their site and try some out for yourself!
Thanks for stopping by! Keep playing with those papers.
Jeanne
Thursday, April 21, 2016
What makes you different, makes you beautiful.
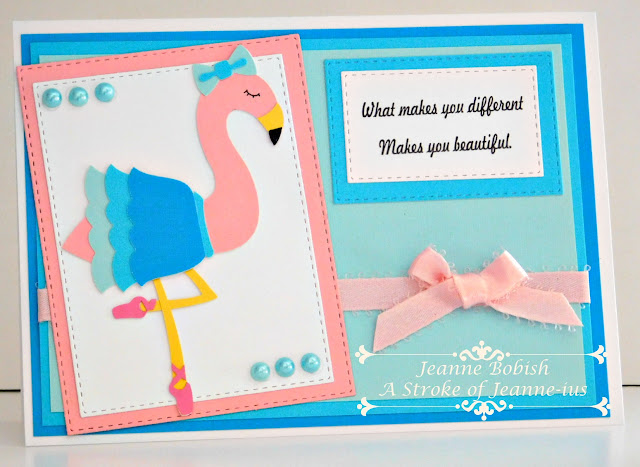
This is my design team submission for this weeks adorable new cut file from Sanqunetti Design. This darling dancing flamingo in her colorful tutu definitely stands out from the crowd. When I found this sentiment online, I knew it was a perfect match!
I started with a 5 x 7 white card base and then added three different shades of teal card stock for the mats and her skirt. The mats were cut using my paper cutter in three shades of teal. I used my stitched rectangular dies in coral and white for behind the flamingo and med. teal and white for the sentiment which I printed out using my word processing software. With teal colored flat back pearls and coral satin ribbon I added the embellishments.
I really like how this card turned out and I just love the sentiment. With so many women and young girls suffering from self-esteem issues, this sentiment says it all! What I great card to send that special female in your life to let them know that they are perfect and beautiful just the way they are!
I hope you like this card and will stop by Sanqunetti Design and see all the wonderful cut files and clip art she has available. You will be glad you did!
Thanks for stopping by and have a great day!
Hugs,
Jeanne
Supplies used to make this card:
Ballerina Flamingo cut file from www.sanqunettidesign.com
5 x 7 inch white base card
Card Stock in the following colors:
Dk. Teal (cut at 4.75 x 6.75 inches for bottom mat)
Med. Teal (cut at 4.50 x 6.50 inches for center mat)
Light Teal (cut at 4.25 x 6.26 inches for top mat)
Light Coral
Yellow
Black
Medium Pink
White
Memory Box Stitched Rectangle Layers cutting dies
Embellishments:
Light Coral Ribbon
Teal colored flat back pearls
Silhouette Cameo or other electronic cutting machine
Cuttlebug or other die cutting machine
glue
paper cutter
Printer and word processing software for printing the sentiment (I used the Freehand521 BJ font for this card)
Friday, April 15, 2016
If Friends Were Flowers......
If friends were flowers, I'd pick you! That is the sentiment on the inside of this adorable card. I had the stamp set with that sentiment for quite a while and haven't yet had an opportunity to use it. Well, when I saw this adorable free digi file on Pinterest, I knew it would be just perfect!
I sized the image to fit on an A2 card and colored it with my Spectrum Noir markers. I have always had a love for coloring since I was a child. Having these markers has really brought that love back to life. I am constantly looking more new and more images to color. I have listed all the supplies I used to create this card below. I hope you will get your markers out and give it a go. Remember, practice makes perfect!
And I also have a little secret.... Stay tuned to find out what it is. I will give you a small clue. It involves a video and my Spectrum Noir Markers.
Supplies Used:
White A2 size base card.
Teal and Coral card stock
Spectrum Noir Markers:
skin: FS2, FS3, TN2
clothes: IB1, IB2, IB3
Tulips: FS6, FS8, CR1
Greens: CG1, LG3, LG5
Lace Trim: IG1 (in the shadows only)
Hair: GB5, GB7, TN5, GB10
Shoes: IG1, IG4, IG7
Stamp:
Stampendous Hand of Friendship (sentiment)
Dies:
Spellbinders Labels 25
Spellbinders Devine Eloquence
Memory Box Fancy Blossoms
Flatback Pearls (if you can't find the matching color of pearls, simply color white ones with one of the colors used in her clothing! Another great feature of these markers.)
Glue
I hope you enjoy this card! Now, get out those markers and start coloring!!!!!
Jeanne
Tuesday, April 12, 2016
We Go Together Like Coffee and Donuts
Even tho I am not a coffee drinker, (tea is my drink of choice), I still could not resist this adorable digital stamp. It is called "Together Coffee and Donuts" and is available from DigiBox Designs and is one of their new images.
The first thing I did with this digital file was to open it in my Silhouette Cameo software. I then create a small offset around the image (white border) then I do a print and cut the size that I want for my card. Then I have loads of fun coloring it with my Spectrum Noir Markers.
I made the card starting with an A2 white base card. I then added mat layers of aqua, yellow and pink. I glued the image onto the pink mat. I then created an offset around the sentiment the same as I did for the image and glued it to the front of the card. There you have it! A quick easy card that would be great to send a friend.
Spectrum Noir Colors Used:
Donut: TN6, TN7
Icing: PP1, PP2, PP4
Sprinkles: LV1, CT1, LG1
Nose: IG4, IG8, IG10
Bear: TN2, TN3, TN5 (and TN1 on the muzzle)
Cup: GT1, GT2, GT3
Patch: LY1, CT2, CT4
Dots on patch: LV1
Hope you give this one a try! Have a great day!
Jeanne
Saturday, April 9, 2016
Basket of Flowers Mother's Day Card
I have been wanting to create this card ever since I purchased the Our Daily Bread Basket die and stamp. I thought it would make a really pretty Mother's Day Card. Since it is snowing here today, I needed something to remind me that it is actually Spring! I think this basket of colorful flowers did just that!
To create the card I selected a 5x7 vanilla base card and added a mat of sage green colored card stock. I then cut the vanilla overlay. I kept the center cutout portion and added that to the card also.
The basket was stamped onto white card stock using Memento ink and then colored with my Spectrum Noir Markers. Using the basket die, I then cut out the basket. If any of the white paper was still showing around the basket, I trimmed it off using a craft knife.
The flowers were made using scraps of colored card stock. I created several different sizes and colors. Then with flower soft, I added the centers to the flowers and cut up the leaf die to add foliage to the basket.
The sentiment was stamped on vanilla card stock and then matted on the sage green card stock. I added one of the extra flowers to the sentiment and a couple of the flowers and leaves to the bottom left side of the basket. As the final touch I added a butterfly to the basket handle.
I really love how this card turned out. I like the colorful, cheerful look of the finished card and I
think it would make a great birthday card too. I hope you will want to give this a try!
Supplies Used:
Dies:
Spellbinders Majestic Labels 25
Our Daily Bread Easter Basket Die
Elizabeth Craft Dies Bunch of Flowers 728
Memory Box Fancy Blossoms
Poppy Stamps Lorelai Leaf
Just Rite Vintage Labels 7
Paper Artist 10 Tiny Things Plus Shadows
Ink:
Memento Tuxedo Black
Versafine Black Onyx
Markers:
Spectrum Noir TN2, TN4, TN6, and the blender
Stamps:
Woodware JWS021 Happy Mother's Day set
Our Daily Bread Basket of Blessings
Flower Soft:
Sunshine Yellow
Meadow
Summer
Keep playing with those papers!
Jeanne
Tuesday, April 5, 2016
Sizzix $2500 (5 Winner) Ultimate Giveaway
Sizzix is having an awesome giveaway! Five winners will each receive a $500 Sizzix Big Shot plus bundle. How awesome is that! Get your entries now at www.scrapbook.com. I can't tell you how much I would LOVE to win this bundle. Can you image how great it would be? But you can't win unless you enter. So stop on over there and get your entries in before it's too late. You wouldn't want to miss out on this incredible chance to win would you?
Have a great day and good luck!
Jeanne
Monday, April 4, 2016
Your the Reason I Smile Card
Today's card features another adorable image file from Digi Box Designs where right now all files are %50 off. This one is entitled All Dressed Up. I colored it using my Spectrum Noir Markers. (colors listed below.)
I used a 5 x 7 white base card. With pink card stock I cut out the largest die from the Spellbinders Fanciful Lattice set. Using the middle die from the Spellbinders 5 x 7 Matting Basics I cut and then embossed a piece of light green. I used my Darice Flower Frenzy embossing folder. The green piece was then wrapped with pink gingham ribbon and then glued onto the pink piece. The girl was then added using foam tape to add some dimension.
With white card stock and my Spellbinders Labels 4 dies, I cut a label and sponged the edges with Spun Sugar Distressed Ink. The sentiment was stamped with Versa Fine Onyx Black ink. Finally I added a bow with the gingham ribbon and glued one green and one pink flower shaped button to the center of the bow from my stash.
Digi Box images are so much fun to color. Why not stop by and check out all the wonderful images they have. Especially now, when all of them are %50 off. They work wonderfully with both greeting cards and scrapbooking projects.
Spectrum Noir colors used:
Skin: FS2, FS3, TN2, CR3
Shoes and Hat: TN2, TN5, TN4, TN7
Soles of shoes: IG1, IG2, IG4, IG6, IG7
Green areas: LG1, LG4, LG5
Pinks: PP1, PP2, CR4
Hair: LY2, LY1, LY3, GB1
I hope you enjoy this card and try one for yourself!
Jeanne
Saturday, April 2, 2016
Free Cut File From Silhouette School
Today's card was created using the free gumball cut file from the Silhouette School Blog. I love bright colors and this design was perfect for them. I used a white A2 base card and added a mat of bright blue. I then resized the gumball to fit on this size card. I created a white offset piece for the shape and then cut the gumballs from yellow, blue, green, orange, purple, and red card stock. Of course the machine parts are in red, black, and silver.
I used a black fine line marker to add details to the bottom hole, across the base of the machine, the highlight on the dome of the machine and the lid of the machine. I used a white gel pen to add the highlights to the lid, gumballs, and bottom of the machine.
I made the label for the bottom of the card in Silhouette studio using the Stencil font. The letters were cut out of the label so that the blue paper underneath shows thru.
I LOVE this free file. It made a really cute card, but I believe it was originally meant to be used on a child's clothing as it comes with the words 'Mommy's 'lil Sweetie" Either way, don't miss out! Be sure to download your copy now!
Thanks for stopping by!
Jeanne
Friday, April 1, 2016
New DT Member for Digi Box Designs and How to Offset Digi Stamps
I have been welcomed as a design team member for Digi Box Designs. I was thrilled to be chosen. This was one of my cards I created as part of the acceptance requirements. I chose the adorable Big Eyed Dog image for this project. I LOVE how this card turned out. I colored him using my Spectrum Noir markers and mounted him on this dark pink cardstock. The white offset around the image really makes him pop.
When I downloaded the file, I found that it had an 8.5 x 11 inch box around the image which made it really hard to determine the size I needed to fit my card. So, I had to come up with a work around. This will explain how I was able to correct that issue.
You will need to download Inkscape if you don't already have it in order to accomplish this task. It is a free software program you can find on the internet. Open Inkscape:
Then opened the Big Eyed Dog file. I used the .png image.
(As you can see, the image has a box around it that is much larger than the image itself.) Once it is on your work space, select it and click on Path, Trace Bitmap.
This box will appear. I don't change any of the settings. Simply hit OKAY. (You will see a rough image appear in the same box in the preview window.)
Now you will see an image that has a smaller, closer box around it. That is the one we want. Click on it and move it aside. (It will be on top of the original image). You can now delete the original image which was underneath.
Next, we will export the file as a .png. To do so, click on file and choose Export PNG image.
Another box will appear. Choose a name and location for this image by choosing Export As. Then click on Export
.
We are now done with Inkscape.
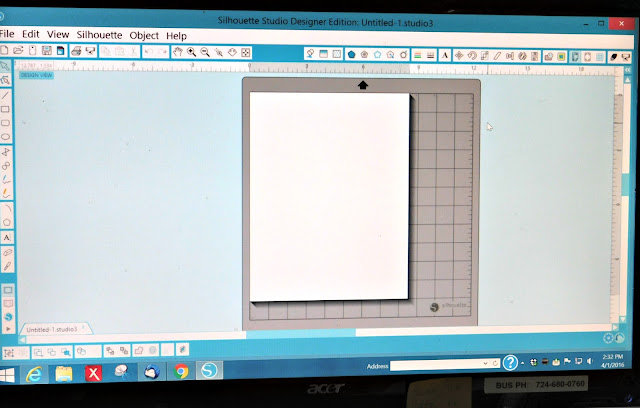
Open your studio software if you haven't already.

Open the .png file you just created.
It will appear rather small on your work space. That is okay.
Now you can easily size it to the size you want by either dragging a corner or using the scale button.
To do a white border around the image you can hit the trace button to open the trace window. Select the area to trace.
Then you will make the grey box cover the area you want traced. You will see your image in yellow.
Turn off High Pass Filter and move the Threshold to the right until there are no black lines showing. Next you will select Trace Outer Edge.
This will create a red line around both the image and the square that came with the image. ( I have moved the original image aside in the photo below). Select the square and delete it.
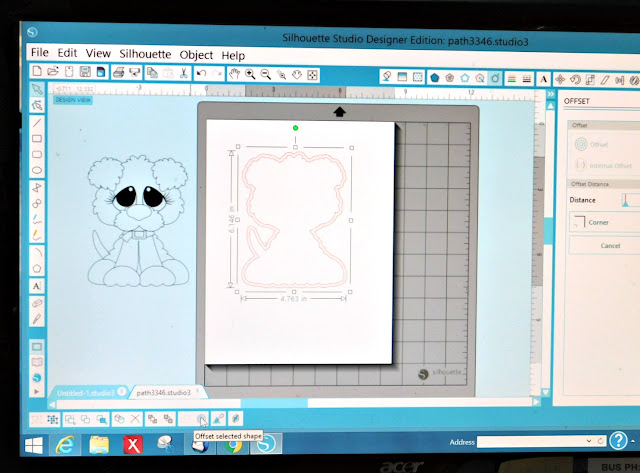
Next hit the offset button and determine the width of the white area you want around your design. You should have two outlines showing on your workspace, click on the inner outline and delete it. Now you will be left with just the offset.

Replace the digital image inside the offset and group. Next you will want to make sure your paper is the proper size for your printer. Add your registration marks. I usually try to get as many as I can on the page so that I will have extras in case I need them. Now you can proceed to do a print and cut.
If you do not know how to do a print and cut, check out the silhouette school blog and search print and cut.
I hope this little tutorial will help you if you ever come across digi stamps that are like this. It took me quite a while to figure out how to do this, but hopefully I can save you some time and aggravation.
Digi Box Designs has some adorable diti stamps that are actually on sale now at %50 off! So get yours while you can!
Again, thanks for stopping by!
See you again soon!
Jeanne
Subscribe to:
Comments (Atom)


